
After Elastic changed its license from the open-source Apache 2.0-license ALv2) to the non-open-source friendly Server Side Public License (SSPL), AWS launched a new fork of both elasticsearch and kibana, This created a media war between AWS and Elastic, you can read all about it here.
This article aims to install and run OpenDistro with OpenID authentication on kubernetes. In this article helm will be used to install OpenDistro.
Note: In this article we’ll not detail how to install keycloak, we’ll do that in another article.
Keycloak is an open source Identity and Access Management solution for applications and services. That means that keycloak is used as a delegue for both authentications and authorizations, this makes it easy to secure applications and services with little to no code.
To achive its job, keycloak operations are based of the two protocol :
For more information on these protocols go here.
In this example we’ll be using OpenID, to configure keyloak follow the following steps:
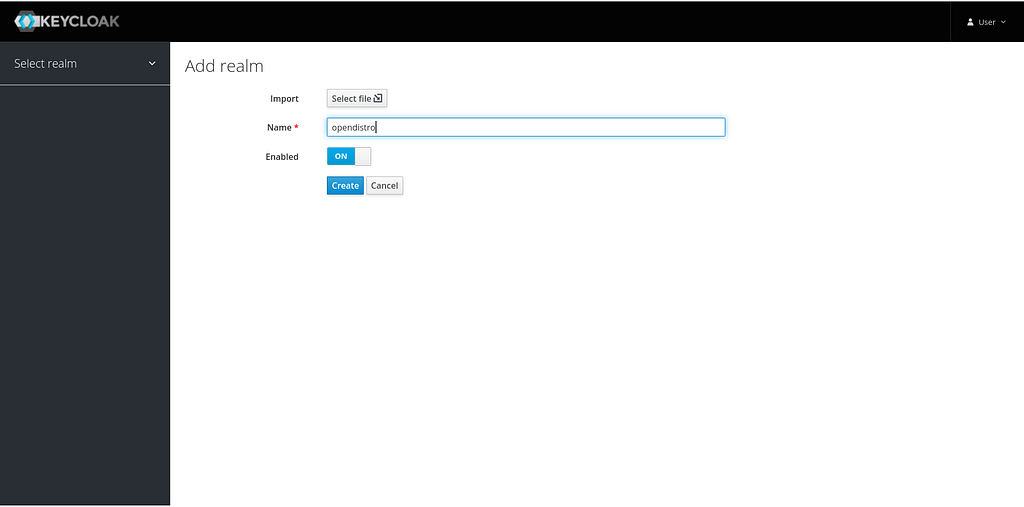
Create a new realm, you can use the master realm or an existing realm, in this article all of the configuration are created under a realm named opendistro.
Create a new client named kibana-sso, add the url of kibana as well, this url will be used for the callback later.

Change the access type from public to confidential and click save, this will enable the use of this client only by authenticated clients, by default it is set to public.

After clicking save, a new tab credentials will be created, save the Secret value for later.

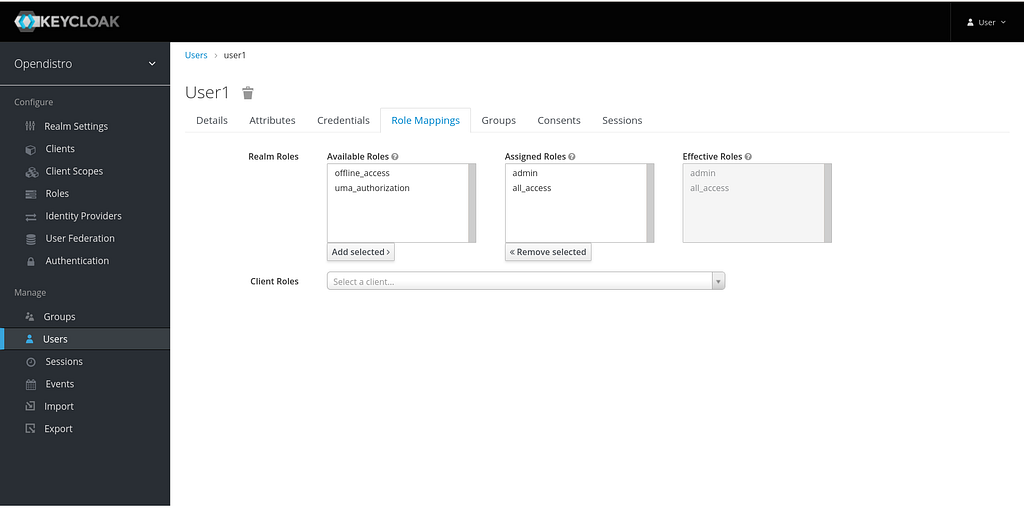
Create a new role, the role must map to an existing role in ElasticSearch. Create another role with the name all_access

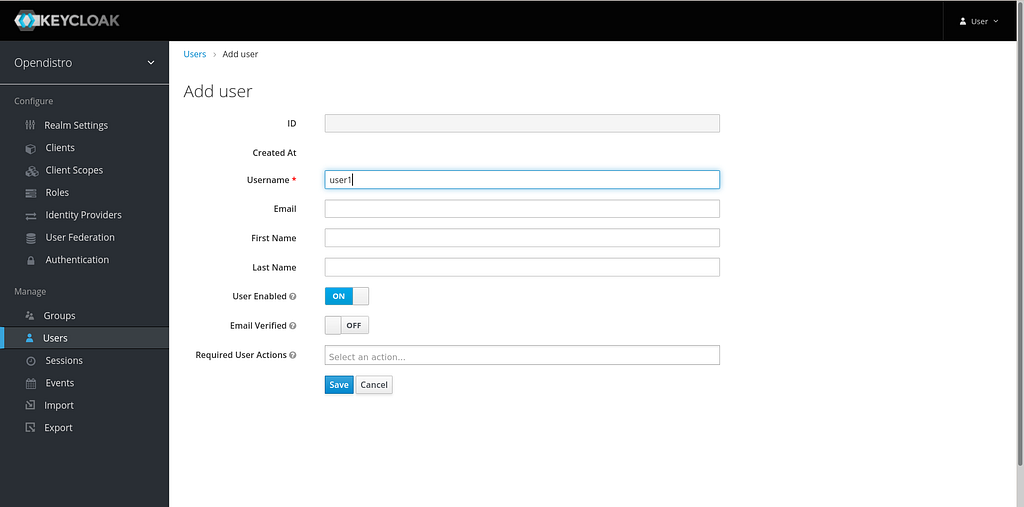
Create a new user
Assign the different roles to the created user
Running OpenDistro chart requires the creation of certificates, theses certificates will be used to encrypt transport traffic (traffic between components like the master node and data node), transport certificates are required in the case of deploying with helm. To generate the certificates follow the steps bellow.
openssl req -new -x509 -sha256 -key root-ca-key.pem -out root-ca.pem -days 365
You can change the days as you need
2. Create Node Certificates
openssl genrsa -out node-key-temp.pem 4096
openssl pkcs8 -inform PEM -outform PEM -in
        node-key-temp.pem -topk8 -nocrypt
        -v1 PBE-SHA1-3DES -out node-key.pem
openssl req -new -key node-key.pem -out node.csr
openssl x509 -req -in node.csr -CA root-ca.pem -CAkey
        root-ca-key.pem -CAcreateserial -sha256
        -out node.pem -days 120
3. Create SSL certificates for kibana
openssl genrsa -out kibana-key.pem 4096
openssl req -new -key kibana-key.pem -out kibana.csr
openssl x509 -req -in kibana.csr -CAkey
        root-ca-key.pem -CA root-ca.pem
        -out kibana.pem  -days 365 -sha256
4. Import certificates as a kubernetes secret
kubectl -n opendistro create secret generic
         elasticsearch-transport-certs
        --from-file=elk-transport-crt.pem=node.pem
        --from-file=elk-transport-key.pem=node-key.pem
        --from-file=elk-transport-root-ca.pem=root-ca.pem
kubectl -n opendistro create  secret  tls
         kibana-tls-secret
         --cert=kibana.pem
         --key=kibana-key.pem
At this time OpenDistro for Elasticsearch helm chart is not packaged yet, you can find the chart on GitHub, if you have a helm registry you can package it and make available for other teams to use, or you can clone the repository and use it directly.
git clone https://github.com/opendistro-for-elasticsearch/opendistro-build.git
First create a secret that contains kibana username and password, this password will be used by kibana to login with Elasticsearch.
kubectl -n opendistro create secret  generic elasticsearch-account
        --from-literal=username=kibanaserver
        --from-literal=password=<YOUR_PASSWORD>
You can set the password to whatever you want, passwords can be overwritten before starting the cluster.
In the values.yml file add the following values.
kibana:
  enabled: true
  imagePullPolicy: "IfNotPresent"
  elasticsearchAccount:
    secret: "elasticsearch-account"
  ingress:
    enabled: true
    path: /
    hosts:
    - kibana.example.com
    tls:
    - secretName: kibana-tls-secret
      hosts:
     - kibana.example.com
  config:
     server.name: kibana
     server.host: "0"
     elasticsearch.hosts: http://<opendistro-client>:<opendistro-client-port>
     logging.verbose: false
     server.ssl.enabled: false
# Secure Cookies can be set if kibana SSL is enabled
     opendistro_security.cookie.secure: false
     elasticsearch.username: ${ELASTICSEARCH_USERNAME}
     elasticsearch.password: ${ELASTICSEARCH_PASSWORD}
# Enable multitenancy
     opendistro_security.multitenancy.enabled: true                           # You can disable the create of default tenant
     #opendistro_security.multitenancy.tenants.enable_private: false
     #opendistro_security.multitenancy.tenants.enable_global: false
     opendistro_security.readonly_mode.roles: ["kibana_read_only"]
#Multi-tenancy uses a specific header, securitytenant, that must be present with the standard Authorization header. If the securitytenant header is not whitelisted, Kibana starts with a red status
     elasticsearch.requestHeadersWhitelist: ["securitytenant","Authorization"]
# Enable authentification via client certificates
     opendistro_security.allow_client_certificates: true
#Kibana OICD configuration
     opendistro_security.auth.type: "openid"
     opendistro_security.openid.connect_url: "https://keyclock.example.com/auth/realms/opendistro/.well-known/openid-configuration"
     opendistro_security.openid.client_id: "kibana-sso"
     opendistro_security.openid.client_secret: "<keyclock-secret>"
     opendistro_security.openid.base_redirect_url:  https://kibana.example.com
Note: By default image pull policy defaults to Always, you need to change it to IfNotPresent, otherwise the chart deployment will take time in the case of a change in the configurations.
Elasticsearch configuration consists of multiple parties:
In an effort to avoid having to exec into the pod to configure the various security options, security options can can be passed through the securityconfig option in the helm chart. For full examples you can see the link.
Configuration need to be passed as secrets, then mounted to the pods, to configure OpenID as a second authentication backend you can use the the YAML file below.
When using Elasticsearch with multiple authentication backend the order is specified via the parameter order in the backend configuration, if the first one is successful then the client is authorized, if not the second backend is used, and so on.
_meta:
  type: "config"
  config_version: 2
config:
  pemtrustedcas_content: |-
    <OPENID_CA_ROOT|base64>
  dynamic:
    filtered_alias_mode: "warn"
    disable_rest_auth: false
    disable_intertransport_auth: false
    respect_request_indices_options: false
    license: null
    kibana:
      multitenancy_enabled: true
      server_username: kibanaserver
    authc:
      basic_internal_auth_domain:
        description: "Authenticate via HTTP Basic against internal users database"
        http_enabled: true
        transport_enabled: true
        order: 4
        http_authenticator:
          type: basic
          challenge: true
        authentication_backend:
          type: intern
      openid_auth_domain:
        http_enabled: true
        transport_enabled: true
        order: 1
        http_authenticator:
          type: openid
          challenge: false
          config:
            subject_key: preferred_username
            roles_key: roles
            openid_connect_url: https://keycloak.example.com/auth/realms/opendistro/.well-known/openid-configuration
            enable_ssl: true
        authentication_backend:
          type: noop
Note: Write the configuration into a file named configs.yml.
Create a kubernetes secret from the created file.
kubectl -n opendistro create secret generic security-config --from-file=config.yml
By default Elasticsearch starts with defaults passwords for some critical accounts such as the admin account, before starting the instance,theses passwords must be changed.
The password hash must be set in the configuration and not the password in clear text, to set the hash you can use htpasswd command or the script that can be found in the docker image of Elasticsearch.
docker run -it  amazon/opendistro-for-elasticsearch  bash
cd /usr/share/elasticsearch/plugins/opendistro_security/tools
chmod +x hash.sh
./hash.sh <password>
Do the process for all user in the file, and write it to a file named internal_users.yml.
Create a kubernetes secret from the created file.
kubectl -n opendistro create secret generic internal-users-secret --from-file=internal_users.yml
In the values.yml file add the following values.
elasticsearch:
  imagePullPolicy: "IfNotPresent"
  securityConfig:
    enabled: true
    configSecret: "security-config"
    internalUsersSecret: "internal-users-secret"
  ssl:
    transport:
      existingCertSecret: elasticsearch-transport-certs
  master:
    enabled: true
    replicas: 1
  data:
    enabled: true
    replicas: 1
  client:
    enabled: true
    dedicatedPod:
      enabled: false
  config:
#NODES_DN, is the name of the subject of the certificate
    opendistro_security.nodes_dn:
    - '<ssl_cert_nodes_dn>'
    processors: ${PROCESSORS:1}
    opendistro_security.allow_unsafe_democertificates: false
    opendistro_security.restapi.roles_enabled: ["all_access", "security_rest_api_access"]
    opendistro_security.audit.type: internal_elasticsearch
    opendistro_security.ssl.transport.pemcert_filepath: elk-transport-crt.pem
    opendistro_security.ssl.transport.pemkey_filepath: elk-transport-key.pem
    opendistro_security.ssl.transport.pemtrustedcas_filepath: elk-transport-root-ca.pem
    opendistro_security.ssl.http.enabled: false                                                                                                                                                                                                #Must set to true to enable the create of users and OpenID configuration
    opendistro_security.allow_default_init_securityindex: true
    opendistro_security.ssl.transport.enforce_hostname_verification: false
    discovery.zen.minimum_master_nodes: 1
    cluster.name: <cluster_name>nsole-openshift-console.apps-crc.testing/
In the case of kubernetes, creating a certificate for each pod is not practical, for this reason a single certificate can be shared between the all the node. To enforce security, Elasticsearch can be configured to accept certificate with a certain subject via the opendistro_security.nodes_dn parmeter.
To get the full subject of a certificate you can use the command below.
openssl x509 -subject -nameopt RFC2253 -noout -in <cert_file>
Note: the nodes_dn can accept regex expresions as well.
helm upgrade --install
     -n opendistro  <release_name>  -f values.yaml
     /opendistro-build/helm/opendistro-es
We can use cert-manager to manage transport SSL certifications, we’ll do this in another article, so stay tuned
You can find all the files on my Github repository.